
By Shannon Magsam, #IamASmartie
![]() OK, all you crafty mamas (and even you not-so-crafty ones, because I promise you can do this!) we’re all going to make gift-worthy clipboards today. Everyone pull up your chairs to the kitchen table and let’s all do this together.
OK, all you crafty mamas (and even you not-so-crafty ones, because I promise you can do this!) we’re all going to make gift-worthy clipboards today. Everyone pull up your chairs to the kitchen table and let’s all do this together.
I’ve added the step-by-step instructions and pictures below to go along with this how-to post. We’re Smarties Ambassadors* this month and wanted to do something crafty involving the candy.
Ready? Ok, for this project, you’ll need: a plain clipboard; several sheets of your favorite 12X12 scrapbook paper (if you’ve never bought scrapbook paper, it’s pretty cheap and you can find it at Walmart or Hobby Lobby); a glue stick or Mod-Podge (also Hobby Lobby); a sanding sponge (or some plain ole sandpaper); scissors; 3/8 inch cute grosgrain ribbon; and Smarties candy rolls.
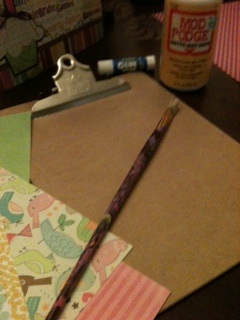
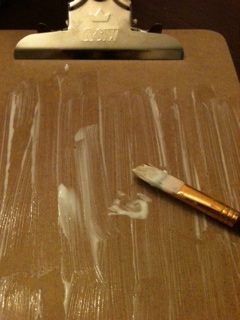
First, choose the main piece of scrapbook paper you want to use and several other complementary-patterned papers. Use a glue stick (or use a paint brush to brush on the Mod Podge) to cover the middle of the clipboard and press down your main sheet of paper. Just let the edges hang over; we’ll take care of those later.
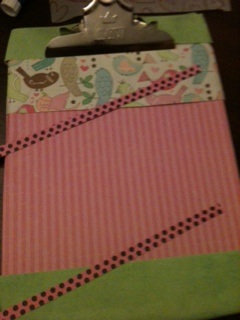
Next, glue on the complementary papers to the top and bottom of the clipboard. It will be tricky gluing the paper around the very top of the clipboard (in particular, the metal clip) so just do a little creative cutting and work around it. Since there will be unattractive lines where the papers intersect on your clipboard, you’ll need to cut two or three strips of paper (or you can use ribbon, if you choose) and glue those where the different pieces of scrapbook paper meet. It will make the design look more “finished”.
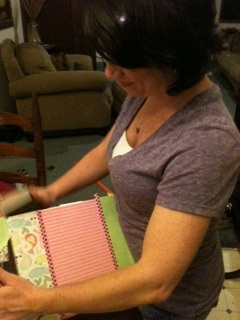
Next, you’ll need to grab that sandpaper or sanding block. If you have any frustrations you’d like to work out today this will help. You might want to step outside or in the garage to do this. I did it at my kitchen table and just did a quick clean-up, your decision. We’re using the sandpaper to work off the extra paper that’s hanging off the edges of your clipboard. Just start sanding and the paper will disintegrate and look distressed around the edges.
Now it’s time to add the cute little ribbons to the hole on the clip part of the board. Just double knot as many on there as you like, leaving streamers as long as you like. Then take your Smarties rolls and line them up along the bottom of the clipboard (have it turned over so you can tape all along the little twists on one end of the Smarties. Your goal is to have them hanging from the bottom of the clipboard. (I also glued some MEGA Smarties and Double Lollies to my scrapbook paper because I thought it was cute).
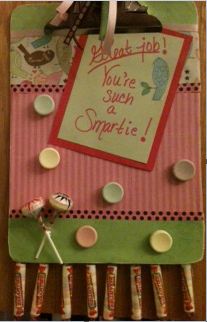
I made this clipboard for my daughter to hang in her room. You can use the clip to hold encouraging notes or even school papers. I chose to write the note “GREAT JOB! You’re such a Smartie!” for the very first note. The Smarties along the bottom — along with the lollies — are for eating. You could also make it for a birthday gift and the note could say something like “Happy Birthday to a friend who’s sweet!” I also thought of a note that would be good for your own child or one of her friends: “In case of homework emergency, treat yourself to a Smartie!” Anyway, here’s my finished product:
For added inspiration, here’s a birthday clipboard I made as a gift:
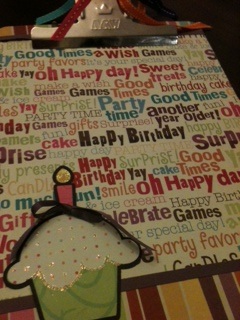
EXTRA PROJECT NOTES: As you can see, I cut out a bird from my scrapbook paper to embellish the note I wrote in the Smarties clipboard. On the birthday project, I used glitter glue around the cupcake edges (plus the flame) and some dark card stock behind the cupcake to give it depth. Just get creative with it!
*This project has been compensated as part of a social shopper insights study for #collectivebias. All opinions belong to the mamas.
How cute is that! Love the idea to surprise a “Smartie” with this! 🙂
So fun! Thank for sharing this creative craft project with Smarties!!! 🙂