Somewhere along the line, people started thinking that scrapbooking was a hobby that takes a lot of time and money. The truth is that it’s only as time-consuming or expensive as you make it. And you can make great pages for a small amount of money that won’t eat up your whole Saturday afternoon.
There’s something special about seeing your photos, especially your kids’ photos, in a handmade scrapbook that you made yourself. No one knows them or their memories better than you do. Pages don’t need to be perfect – just personal.
If you’d like to start a scrapbook and don’t know where to begin, read the tips below from a scrapbooking artist at Signed Sealed Delivered. Or you may want to take one of their “Beginning Scrapbooking” classes which will give you tips on basic layout design, picking the right products and tools, and even one-on-one help in creating your first scrapbook layout.
Just bring 6 to 8 favorite photos of a related theme (Easter, birthday, etc.) and you’ll leave class with a completed layout. The class costs $10 and includes instruction, paper and accents. (Take this class with one of your friends. It’s a lot of fun to work side by side and chat during the creative process.)
Step 1: Start by organizing your photos and memorabilia. Categorize them by date, holiday, event, vacation, person—whatever works for you. Remember that you don’t have to include all of your photos in a scrapbook. Start with your favorite pictures and special memories.
Step 2: Collect items from special events and everyday life. A lock of hair, awards, letters, concert tickets, report cards, children’s artwork, newspaper articles, programs—whatever helps record your family’s history.
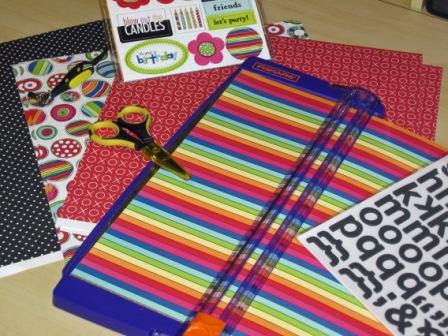
Step 3: Gather a few essential tools. Although there are hundreds of cool tools and gadgets that can be used to create scrapbook pages, all you need to get started are a few simple ones:
- Black pen: This handy little tool is great for journaling, doodling, and adding creative touches to your pages. Pick an archival-quality pen that has pigment ink, is non-bleeding, waterproof and light-fast. I recommend A Black Zig Writer by EK Success. This pen has both a bold and fine point, is inexpensive and great for lettering.
- Adhesives: A dry, double-sided adhesive is generally a beginner’s best bet. Try Kokuyo Dot ‘n Roller for a smooth and easy application.
- Paper trimmer: Choose a trimmer that’s portable, precise and has a 12” cutting surface. There are many reasonably priced cutters that fall into this category.
- Album: A way to safely store your completed pages is a necessity. Look for an album that is archival quality, acid free, and lignin free. A variety of sizes is available, however, the most popular size is 12×12.
- Scissors: Basic crafting scissors are great for adding accents and custom embellishments to your page. Choose a comfortable, small scissor like the Honey Bee Scissors by EK Success. They have a non-stick coating that’s great for cutting through stickers and adhesives but can also be used on ribbon.
- Archival-quality papers and accents: Choose papers and accents that coordinate with your photos. To take the guess-work out of matching colors and themes, take your photos with you when shopping for supplies. Collect both solid and patterned papers that complement your pictures and a few stickers or accents that help convey the story.
Step 4: This is the fun part! Place photos and embellishments on selected background pages and move them around until you like how it looks. The wonderful thing about scrapbooking is that you have complete control. Just enjoy the process. Add some journaling to tell the story behind the photos, and there you have it!
Remember, this doesn’t have to be the Mona Lisa of all scrapbooks. The whole point is to record your family’s history and share meaningful memories and stories. Let it become a book that will be enjoyed for generations to come.

For more info on the Beginning Scrapbooking classes, click HERE to visit the Signed Sealed Delivered website or call them at 479-271-7747 to find out when the class will be offered.
