Guest post by artist Amber Perrodin
Sale alert note from the mamas: Amber’s husband makes her artist panels (as seen in this post). He sells them on Etsy as Perrodin Supply Co. The Perrodins have generously offered to sell these to Motherlode readers at an exclusive 30% off. The coupon code at checkout is CraftyMama. It expires in exactly a week (on March 7) and is good for anything in the store!
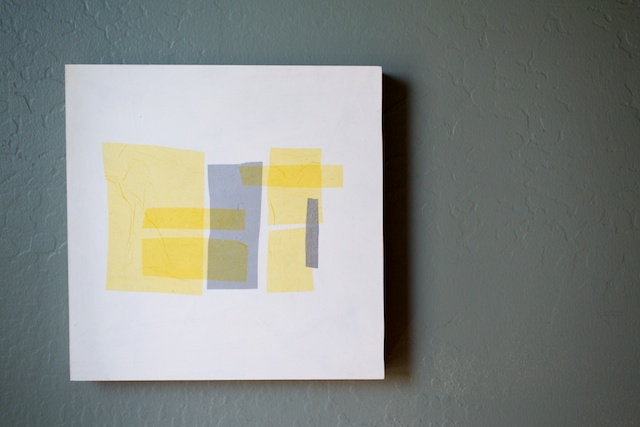
Making art doesn’t have to be a lot of work. In fact, you don’t even need a studio, a ton of supplies, or three weeks of your time. I’ve found an excellent way of making a beautiful work of art that you will be proud to show off and it literally takes less than 20 minutes from start to finish. The most exciting part of this project is that you probably already have nearly everything you need on hand.
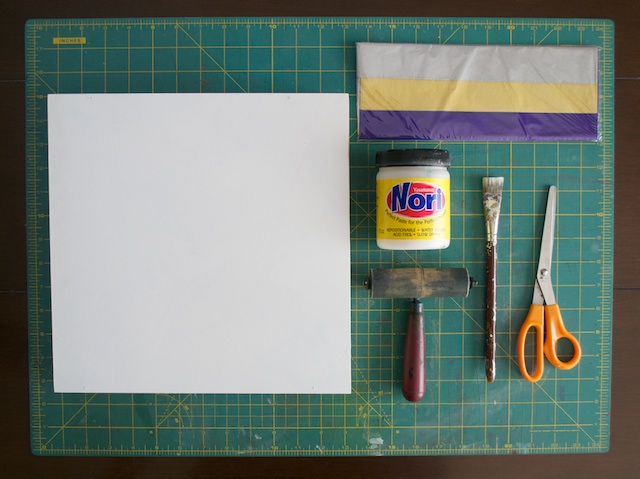
What You’ll Need:
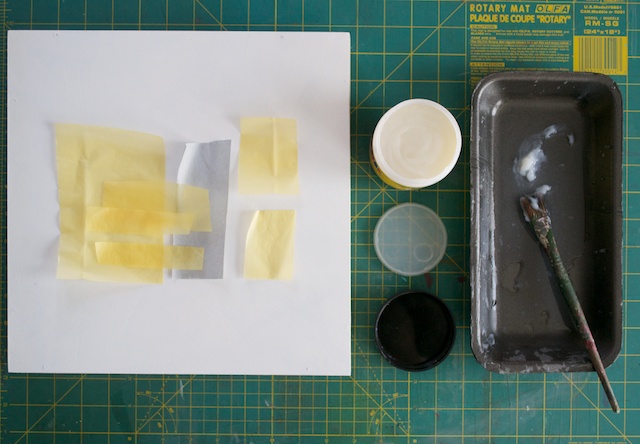
- 1 artist panel – the size is up to you! (mine is 12” x 12”). Though you might be tempted to use a canvas…an artist panel is a must in order for this project to work! Panels look very much like a typical canvas, but are wooden. This makes the surface firm and easier to work with in this particular case.
- 2 colors of tissue paper
- scissors
- water
- Nori Paste – this is an acid free glue that dries absolutely clear! Elmer’s or Modge Podge will work just fine as a substitute, but will eventually crack and turn yellow. I order Nori Paste from Dick Blick art supplies. This glue is very cheap, versatile and will seriously last you forever. Here’s a link: http://www.dickblick.com/products/yasutomo-nori-paste/
- 1 paintbrush – Grab one of your kids’ medium size brushes if they have one.
- 1 brayer – Alright, to be honest…I didn’t even use this. It’s the “rolly” thing pictured with the other supplies and would come in handy if you were doing large sheets of paper, but for this project, your finger will serve the same purpose.
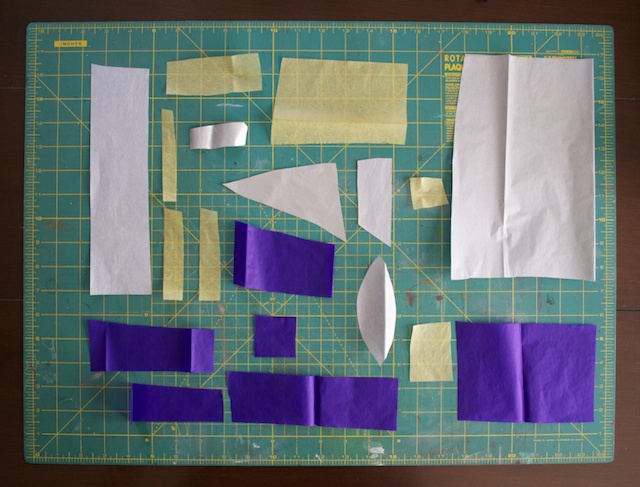
Step 1: The hardest part of this entire process is choosing your tissue paper colors! I started out with three colors, but I think that in order to keep it clean and simple, narrowing it down to two colors was a good decision. I know that it’s going to be tempting to use 18 colors – but for the love of art…choose two!
Step 2: To begin, start cutting up your paper into rectangles and squares. This should be fun, not stressful! Don’t over think anything at this point, because you’re just playing with shapes. Take your time and cut nice, clean edges. You will eventually be gluing these to your artist panel and those clean edges will make all the difference.
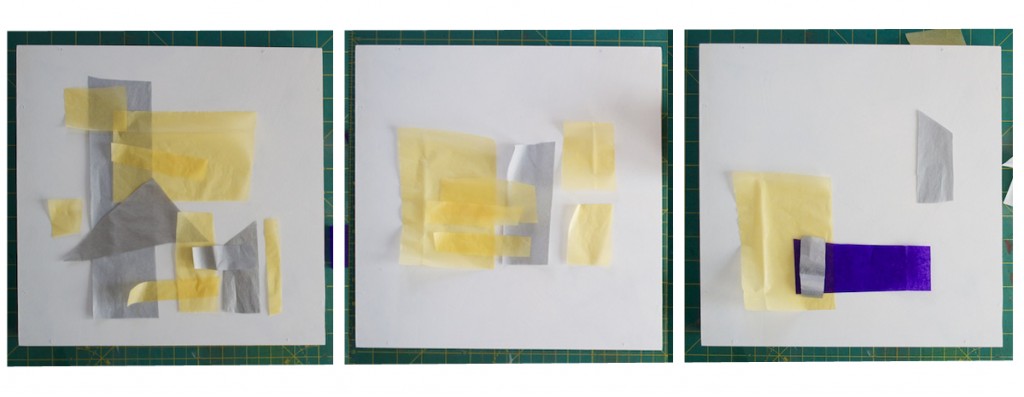
Step 3: Once you have a variety of shapes, sizes, and colors cut out, begin to lay them on your panel to see what designs and color combinations that you like best. Also, overlapping them is what makes this piece so beautiful. Try putting your lighter color on top of your darker color. This should give you a beautiful affect! Take the extra few minutes up front and really consider how you want your artwork to look.
Step 4: The next step is to begin gluing. You’ll need to remember where you’ve decided to put your papers and then remove them from the panel. I went from memory, but taking a picture with your smartphone might help if you’re afraid you won’t remember how it looked.
Step 5: No matter what glue you’ve decided to use, you will need to mix it with equal parts water. I personally tend to error on the “more glue than water” side. Make sure that you’re glue is mixed in well and then “paint” the glue all over your panel in one thick, even coat. Don’t be shy with this part…you don’t want it to dry before you put the paper on.
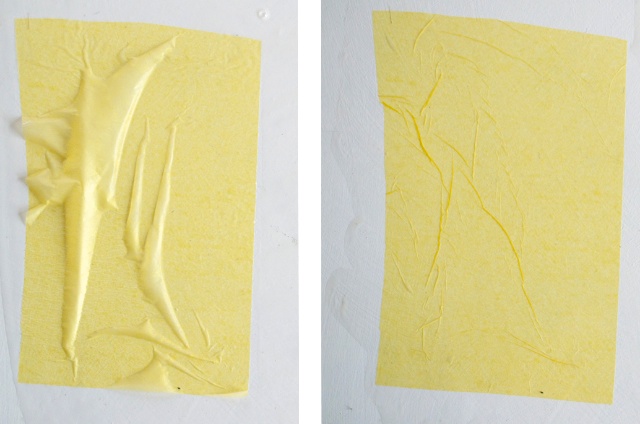
Step 6: Now, carefully lay your tissue paper design back onto the panel. Gently rub it with your finger until it is flat and fully adhered to the panel. Wrinkling is fine! Also, refrain from lifting the paper once you’ve laid it down.
Step 7: Once you’ve adhered all of your pieces, put one more coat of your glue mixture on the entire surface. If your tissue paper is dark, it may bleed. Embrace the bleed lines and let it be a part of your artwork!
Voila! Fine art. Now invite some friends over and brag about all your hard work!
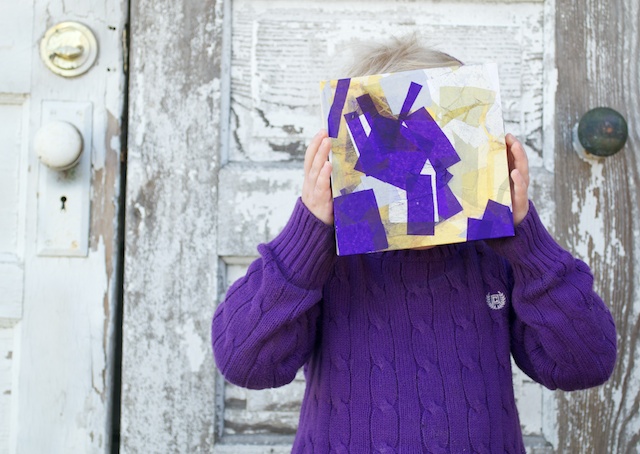
If this project leaves you feeling inspired, let your kids make one with your left over paper and glue! I let my 3 year old daughter loose with these materials and she LOVED it! She even took it a step further and let the paper go over the edges. This was so much fun and it turned out beautifully! The possibilities are genuinely endless.

My most favorite piece of art that I’ve made is with various types of paper (including tissue paper) and quotes about home. They are all decoupaged onto a very large rectangle. Gluing paper is so much fun!!!!!!!!